Build a Simple Fold-Down Wall Table for Small Spaces: Step-by-Step, Variations, and Troubleshooting
A calm, practical guide to building a sturdy fold-down wall table for eating, working, or crafting in a compact home. Step-by-step instructions include common mistakes and clear corrections, plus variations and a focused
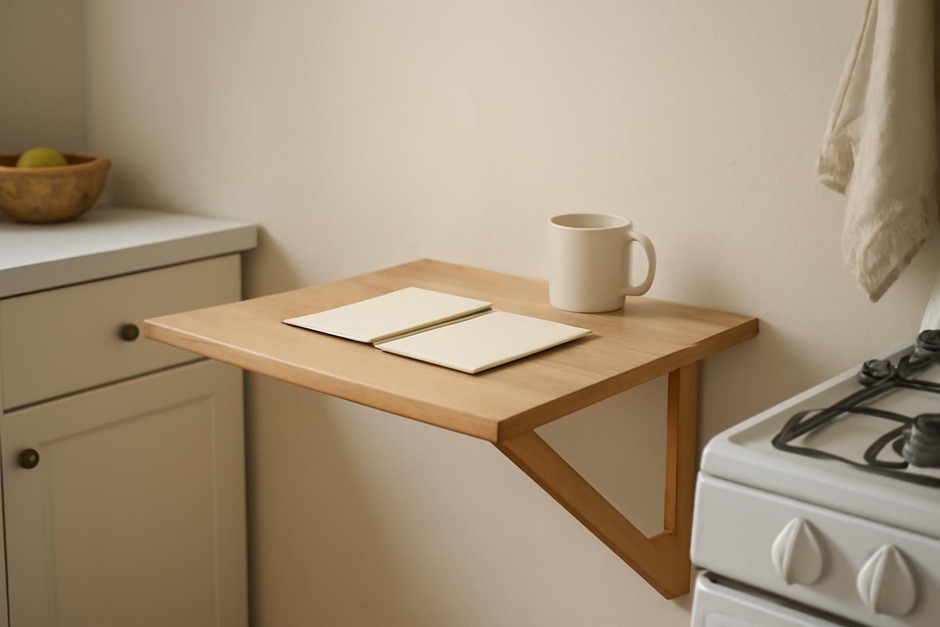
When floor space is limited, a wall-mounted fold-down table turns a narrow corner into a useful surface for meals, crafts, or a laptop. Below is a calm, methodical build you can complete with basic tools and materials, followed by helpful variations and troubleshooting tips. Each step includes common mistakes and simple corrections so the finished table is tidy, stable, and pleasant to use.
Step-by-step method
-
Plan the size and location.
- Measure the available wall height and width and decide the table depth. A comfortable depth for dining or working is 18–24 cm (12–20 inches), depending on the room.
- Common mistake: choosing a depth that blocks a walkway or sits too high for chairs.
- Correction: mark the table outline on the wall with painter’s tape and sit at the intended height to confirm legroom and chair position.
-
Choose materials and hardware.
- Use a solid board (plywood or hardwood) for the top, 18–25 mm thick for rigidity. Select folding brackets rated for at least twice the expected load.
- Common mistake: buying lightweight brackets or a thin board that bends under weight.
- Correction: check load ratings and opt for a slightly thicker top. If in doubt, add mid-span support or choose metal brackets with safety pins.
-
Locate studs and mark fastenings.
- Use a stud finder or gently tap the wall to find solid framing. Mark the stud centres for bracket attachment.
- Common mistake: mounting heavy brackets only to drywall anchors.
- Correction: whenever possible, align at least two bracket fasteners with studs. If studs are unavailable, use heavy-duty wall anchors rated for the load and follow manufacturer instructions.
-
Cut and finish the tabletop.
- Cut the board to size, sand the edges, and apply a finish (paint, varnish, or oil) to protect from spills.
- Common mistake: installing an unfinished board that quickly stains or swells from humidity.
- Correction: seal all exposed edges and the underside; allow finishes to cure fully before mounting.
-
Install brackets carefully.
- Mount the folding brackets at the marked height, ensuring they are level and spaced evenly under the tabletop location.
- Common mistake: brackets installed slightly askew, causing the table to sit unevenly.
- Correction: use a spirit level during screw placement and temporarily set the tabletop in place to confirm alignment before tightening fully.
-
Attach the tabletop and test.
- Fix the tabletop to the brackets using the recommended screws. Test folding and unfolding several times and place gradual weight to check stability.
- Common mistake: overtightening screws that strip or crack the board.
- Correction: predrill pilot holes and use the correct screw length. Tighten snugly but avoid crushing the wood fibers.
Variations
- Integrated storage: Add a slim shelf or shallow cubby beneath the table for placemats, utensils, or small tools.
- Drop-leaf style: Build a slightly larger top with hinged leaves that fold down on both sides, keeping a narrow central panel fixed to the wall.
- Different supports: Use a hinged wooden leg that swings down instead of metal brackets for a softer look. Combine with a simple latch to lock the leg when folded.
- Materials switch: For an industrial look, use a metal top or reclaimed wood with a clear oil finish. Lightweight melamine is easy to clean but choose thicker panels to prevent sag.
- Height adjustment: If multiple users will use the table, consider making two versions at different heights or pair the table with adjustable seating.
Troubleshooting checklist
- Table wobbles: Check that all bracket screws are tight and that the brackets sit flat against the wall. Loosen, reposition, and tighten if the wall surface was uneven.
- Hinges feel stiff or sticky: Clean hinge pivots and add a few drops of light machine oil. Avoid over-lubricating near finished wood—wipe excess immediately.
- Surface sags over time: Add a central support or upgrade to a thicker board. Consider a strip of metal or a small folded wooden cleat under the top for added stiffness.
- Screws strip or pull out: Replace with longer screws into studs or larger, heavy-duty wall anchors. If a screw hole is damaged, fill with epoxy wood filler, let cure, then re-drill slightly smaller pilot hole.
- Table hits baseboard or window sill when folded: Measure folded clearance ahead of time. If interference is present, trim the baseboard slightly or raise the mounting height by a few centimeters.
- Finishes scratch easily: Add a removable placemat or thin protective pad. For frequent use, choose a harder finish like polyurethane or durable laminate.
With careful measuring, the right bracket choice, and attention to common pitfalls, a fold-down wall table will serve as a reliable, space-saving surface for years. Start modestly, test the components, and use the variations above to tailor the table to your daily routines.